
Your Cart is Empty
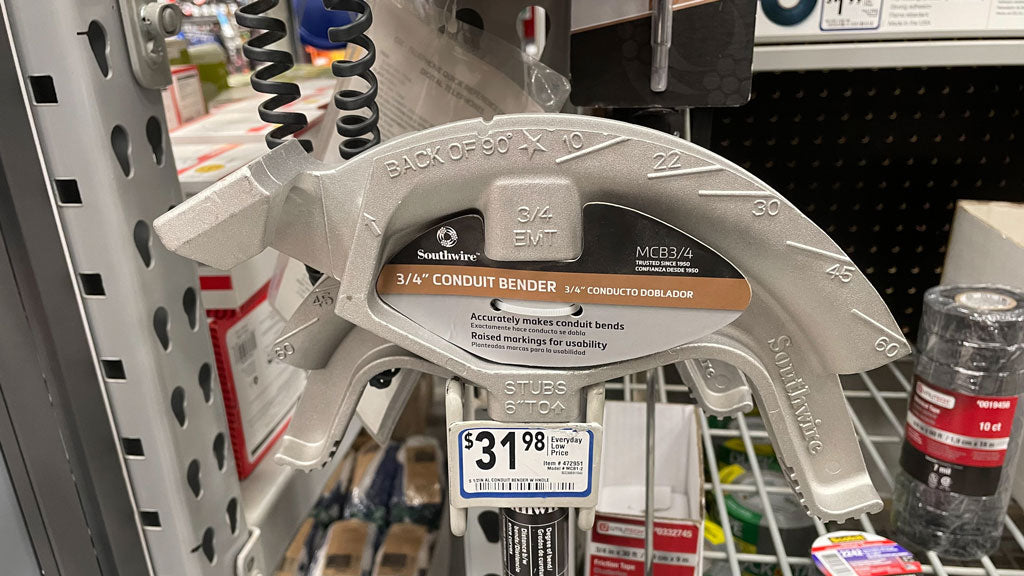
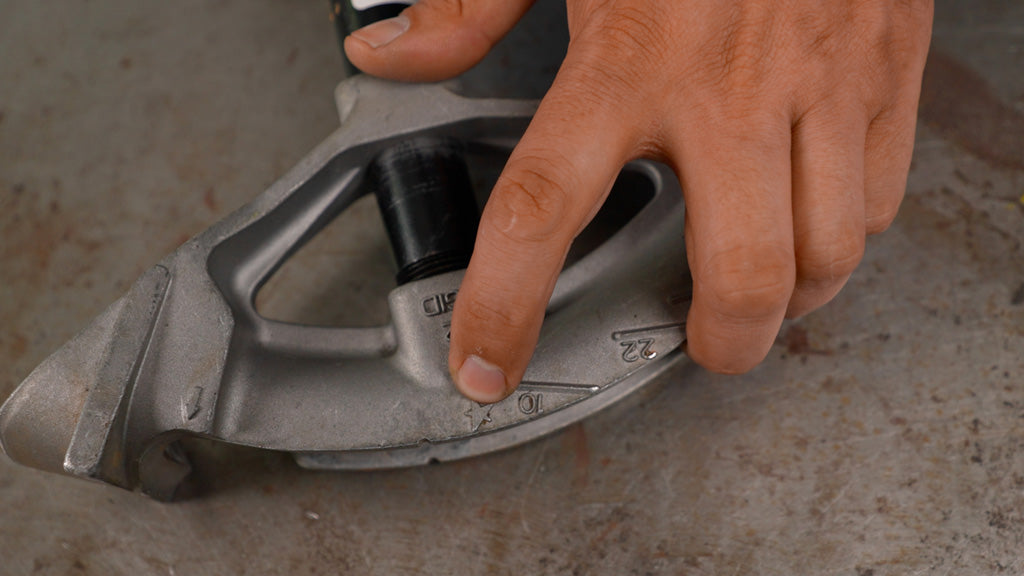
In the electrical aisle of your local home improvement store you will some tools for working with EMT Conduit. One of which is this tool that has a long handle and curved cast head. This tool is known as a conduit bender. You'll want to make sure that you get the bender that matches the size of EMT Conduit you're working with. In our case that is 3/4" Conduit.

On the head of the bender you can see a series of marks along with a channel that the conduit will sit in while it's being bent. You'll notice that there is an arrow pointing to the channel and this is where the bend in your conduit should start. If you want your bend to be 12" from the end of the pipe then you will mark the conduit with a sharpie or marker and then line up the arrow with that mark.
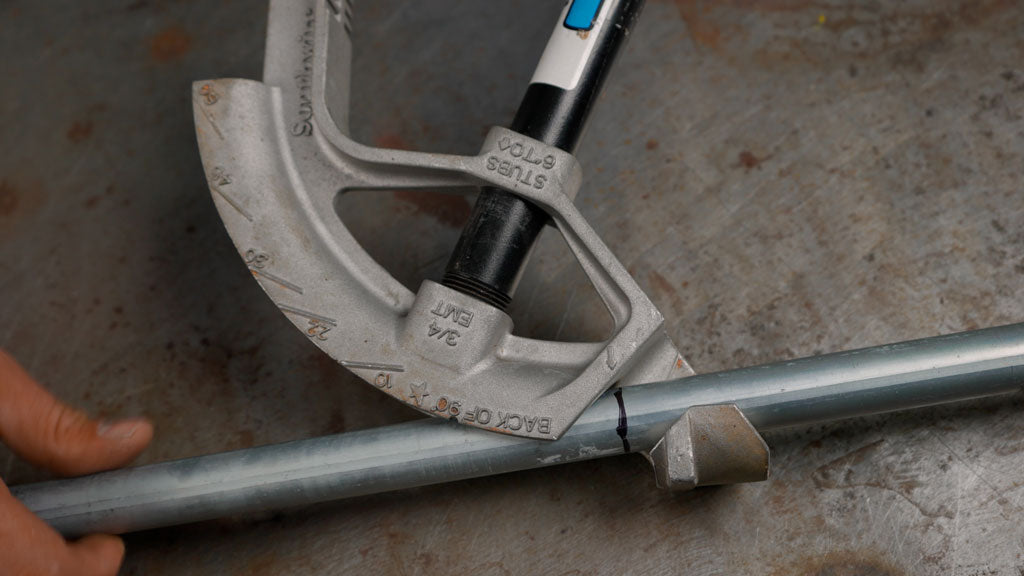
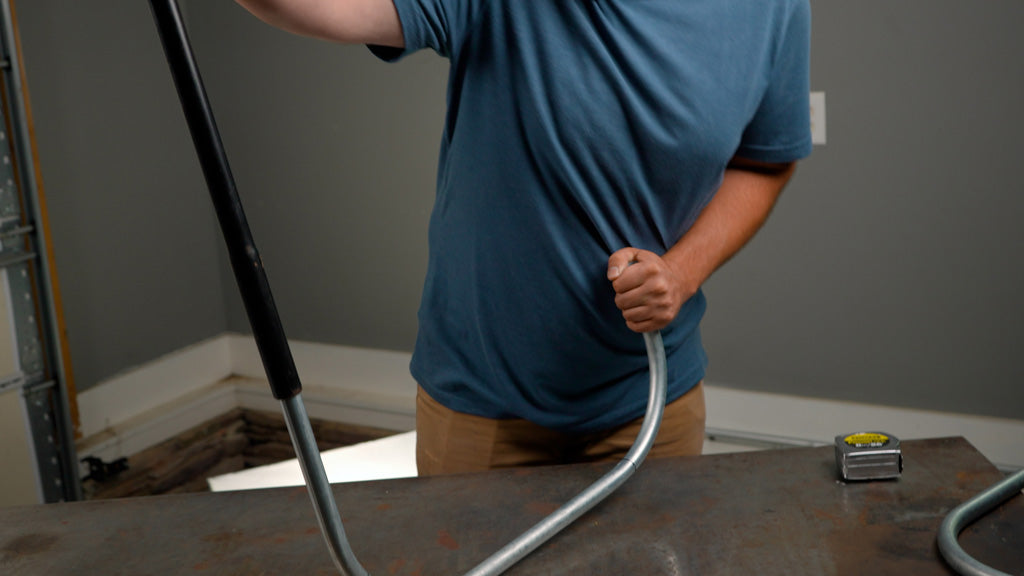
Next on the head is a stem that sticks up in the air that looks like a foot pedal. You will step on this part of the bender and pull the handle to apply some force and start the bend.
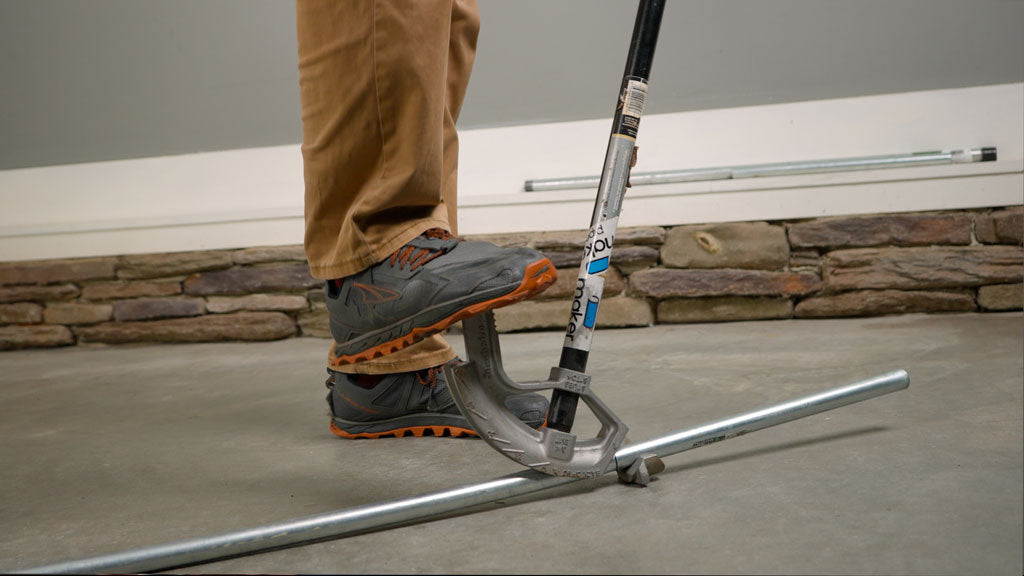
While you're bending the conduit it will be in the channel mentioned earlier. On the side of the channel there are a series of marks that let us know what angle we are at with the bend. For example if you want a 45 Degree bend then you will keep stepping and applying force until the conduit is parallel with the 45 degree mark on the bender. You'll follow the same process for other angles too.

One of the other marks to note lets us know what size radius the bend has. Most benders will be like the one we used which has a 6" radius. It's important to keep that in mind when building and lining up other conduit and connections.
There is one last important mark on the bender and this one helps us line up a U-shaped bend in the desired location. This mark is a star and sits on the opposite end of the arrow. This star mark indicates the start of a bend. For example if you wanted your bend to start at 24 inches from the end then you will mark the conduit and then line up the mark with the star mark and make your bend.
It's important to make sure the second bend in the U is in the same plane as the first bend so you don't get a crooked pipe or what's known as a dog leg.
If you over bend your pipe there is a built in tool on the bender that helps correct this. The handle of the bender is a slightly larger radius than conduit so you can slide it over your over bent conduit. You can then start pulling the pipe away from the other one and correct your bend pretty easily.
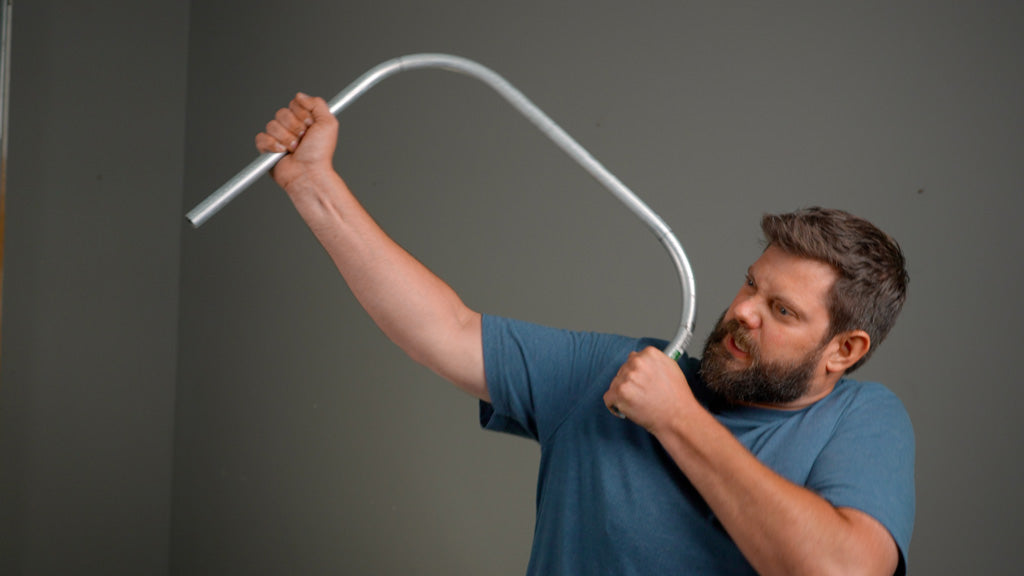
With a little patience and practice you can master the skill of bending conduit and use it in your projects! If you need more help learning how to bend conduit feel free to reach out to us and we will be happy to give some more advice. We can't wait to see how you use bends in your EMT Conduit projects.


