All gardeners need a helping hand now and then and a cold frame offers the best help a gardener can get. Weather is the most unpredictable of variables when it comes to gardening and it can quickly turn a promising crop into a dried, shriveled mess.
Cold frames help you to take back some control over the weather conditions and allow you to plant all year round. Protect your plants from frosty early spring mornings with a DIY cold frame greenhouse.
What Is a Cold Frame Greenhouse?
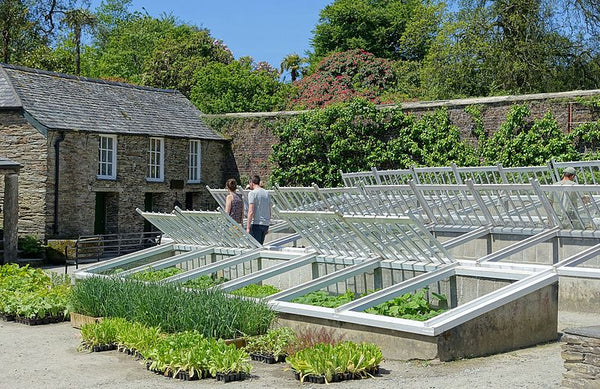
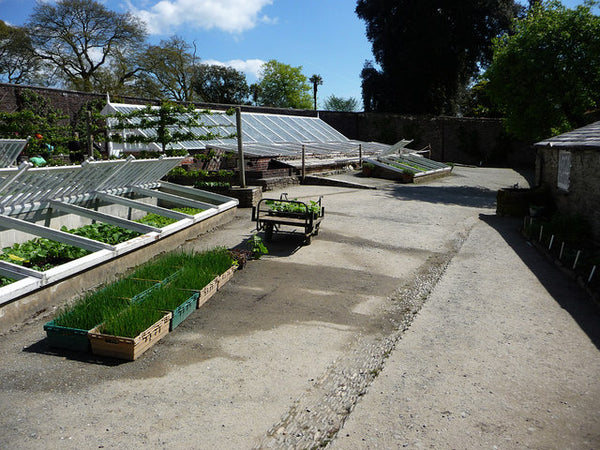
A cold frame greenhouse consists of a bottomless wooden box for adequate drainage, which is covered with a hinged transparent roof. They are typically built low to the ground from lightweight, durable materials to make them portable and low-maintenance.
Cold frames protect your seedlings and plants from extreme winds and frost, as well as retain heat to promote germination and growth. You can use a cold frame greenhouse to extend your gardening season. This is ideal for regions with extreme weather conditions and to harden off seedlings that were planted indoors over the winter, which encourages healthy growth.
What Is the Best Place to Put a Cold Frame?
One of the best aspects of a cold frame garden is that it is a bottomless, lightweight structure, which means you can move it to any location in the garden. However, there are a few guidelines you should follow when it comes to positioning your frame to get the most out of your cold frame gardening experience:
- Opt for southern exposure with full sunshine;
- Ensure there is adequate drainage on your site - you may need to dig down into the soil a few inches or add a layer of gravel;
- The site should be sheltered from the wind;
- Keep the frames away from falling foliage, as leaves can quickly cover the clear lid and prevent the sun from warming your plants; and
- Add hay bales to the north side of the structure for extra insulation during the coldest months of the year.
How Do You Build a Cold Frame Garden?
You can build a frame from a variety of materials, but we found that EMT conduit is the best option. This is because it is weatherproof and hard-wearing. There are endless possibilities when it comes to building a frame, but we’ve rounded up four of the most effective and economical options.

Basic Hinged Cold Frame
A basic design for a traditional cold frame uses a slanted wooden base with a clear-hinged lid that can be propped up for ventilation when necessary. However, the timber traditionally used for the structure can make them heavy, which means they are not easily moved around your garden.
Our version of the basic DIY cold frame is made from lightweight EMT conduit and plywood for better maneuverability.
To make our lightweight DIY cold frame, you will need:
- 6x 71-inch lengths EMT conduit
- 4x 32-inch lengths EMT conduit
- 2x 34-inch lengths EMT conduit
- 2x 15-inch lengths EMT conduit
- 2x 9.5-inch lengths EMT conduit
- 1x 71 x 32- inch piece of clear acrylic sheet
- 1x 71 x 9.5-inch plywood panel
- 1x 71 x 15- inch plywood panel
- 2x pieces of plywood cut to fit the sloped sides of the frame
- 12x 90-degree structural pipe connectors
- Lag screws and washers
- Hinges
Instructions:
-
Make the base to the frame by connecting 2 of the 71-inch lengths to 2 of the 32-inch lengths of conduit using 4 of the 90-degree connectors to create a rectangle.
- Add the 2 15-inch lengths of conduit to the two corners of the base furthest away from you.
- Add the 2 9.5-inch lengths of conduit to the two corners of the base closest to you.
- To each vertical length of conduit, add a 90-degree connector facing horizontally. Connect the two 15-inch lengths of conduit to a 71-inch piece of conduit. Connect the 2 9.5-inch lengths of conduit to a 71-inch piece of conduit. You now have your basic pipe frame.
- Attach the appropriately sized pieces of plywood to the sides of the basic frame using the lag screws. Drill a pilot hole into the conduit and place a washer before securing the screw in place.
- Make a frame for the lid. Create a rectangular frame using the remaining pieces of conduit and 90-degree connectors.
- Attach the acrylic to the frame with screws, ensuring that you drill pilot holes to avoid cracking the acrylic.
- Attach the hinges to the back of the basic frame and lid, and your cold frame is ready to use.
EMT Conduit Hoop Frame
As with most cold frame plans, a hoop frame is customizable. This type of cold frame is ideal for gardens that already have raised beds in place. The added height offered by the hoop shape allows you to grow tall crops such as kale or chard.
To make a hoop frame to fit an 8-foot raised garden bed you will need:
- 5x 6-foot lengths of EMT conduit bent into a half-circle shape
- 1x 8-foot length of EMT conduit
-
2x 90-degree structural pipe connectors
- Zip-ties
- Stick-on Velcro patches
- 1 roll of 6-mil clear plastic, approximately 10 x 25-feet
Instructions:
-
Add 90-degree structural connectors to 2 of the 6-foot EMT conduit hoops so they sit at the apex of each hoop facing horizontally.
- Connect the 8-foot length of conduit to the 90-degree connectors on the 2 hoops using the hardware provided.
- Insert the basic frame into the raised bed so that the ends of the conduit sit in corners of the garden bed at least 6 inches in the soil.
- Place the remaining 3 conduit hoops over the top of the basic frame at equal distances apart. Push them into the soil until they sit flush on top of the frame and secure to the frame with zip ties.
- Cover the frame with plastic wrap securing where necessary with the zip ties. At the ends of the tunnel, create tent-style flap doors and stick on the Velcro patches so that you can open and close the ends of the frame for ventilation.
Recycled Window Frame Hinged Lid
Another great idea to convert raised garden beds into a cold frame greenhouse is to upcycle old window frames to create a hinged lid. You can add the upcycled window lid directly to your raised beds. Alternatively, you can create a modified raised bed with a slanted window lid.
To modify a 3x2-foot raised garden bed, you will need:
- 25 x 36-inch window frame
- 2x 15-inch lengths EMT conduit
- 1x 36-inch length of EMT conduit
- 2x 90-degree connectors
- Clear plastic sheeting
- Hinges
- Lag screws and washers
- Staple gun
Instructions:
- At either end of the 36-inch length of conduit, add the 2 90-degree structural connectors and secure using the hardware provided so they are facing vertically down.
- Connect the 2 15-inch lengths of conduit to the 90-degree connectors.
-
Insert the basic garden frame into the back 2 corners of the garden bed until they hit the bottom of the bed. There should be around 6-inches of conduit above-ground. Secure the basic frame to the wooden garden bed using lag screws and washers. Don’t forget to drill a pilot hole in the conduit before driving the screw.
- Attach the hinges to the back of the window frame and the top of the conduit frame to form the hinged lid.
- Staple lengths of plastic sheeting to the sides of the window frame to cover the gap created at the sides.

PET Bottle Cold Frame
If you want to take recycling to the next level, old PET plastic bottles make a cost-effective alternative to building a wood and glass cold frame. Despite a large number of bottles needed, this build comes together within an hour or two. Alternatively, if you are really short on time, you can cut the bottom off your old plastic bottles and place them over individual plants to create mini-greenhouses.
To make a recycled PET bottle cold frame, you will need:
- 16x 3-foot lengths of EMT conduit
- 12x 90-degree structural pipe connectors
- 150x clear 2L PET bottles (each bottle should be about 4-inches in diameter)
- Clear silicone adhesive
- Hinges
Instructions:
- Begin by building a simple cube box frame using 12 lengths of conduit and 8 of the 90-degree connectors.
- Using the remaining conduit and connectors, build a square frame that will act as the lid.
- Use the silicone adhesive to stick the PVC bottles around the walls of the cube frame. You should end up with 3 rows of 9 bottles per side. Repeat with the remaining bottles for the lid frame. Make sure to add enough adhesive so that the gaps between the bottles are sealed.
- Attach the lid to the top of the box frame using the hinges so that you can open the lid on warmer days for ventilation to minimize excess humidity.
Best Crops for a Cold Frame Greenhouse
While nearly all plants can benefit from the natural solar warmth and protection of a cold frame greenhouse, there are a few crops that truly flourish under a DIY cold frame, including:
- Broccoli
- Cabbage
- Cauliflower
- Arugula
- Kale
- Radish
- Spinach
- Lettuce
If you are planting your seeds directly into the cold frame, make sure you have the cold frame constructed approximately 2 weeks before your planting date to allow time for the soil to warm up. If you are starting your seeds indoors and transferring seedlings for gardening, you can transfer them up to 6 weeks ahead of the recommended planting date for your region.
Final Thoughts
We love using cold frames in our garden so that we can enjoy fresh vegetables and salad greens all year long. Try one of these affordable and simple cold frames to protect your plants and boost the growth of your seedlings when the weather gets cooler.
Contact us to learn more about how you can use Maker Pipe structural connectors in your DIY projects. Browse our site to find out about our range of structural pipe connectors.


