
Your Cart is Empty
Microgreens are an excellent way to get your daily vegetables and the perfect plant for urban gardeners. I regularly grow microgreens at home in my DIY microgreens garden to save money and for added convenience.
Growing microgreens at home is easy and fun. All you need is a microgreens tray, distilled rainwater, liquid nutrients to mix with the water, growth medium, and a spray bottle.
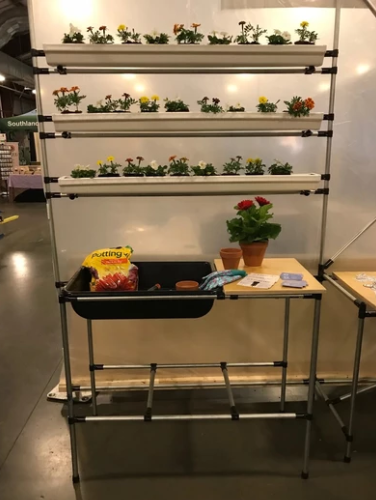
 A set up from Molly’s Micros using Maker Pipe products
Place the growth medium in the trays and sprinkle-soaked microgreens seeds evenly over the top. Mist the seeds with the water and liquid nutrients, then cover the tray with a second inverted tray to keep out the light for at least five days. Mist every 12 hours with the water-and-nutrient mixture.
Once the seeds have sprouted, uncover the microgreens trays and place them in an area with plenty of natural light, or shine a fluorescent light on top of them. Water them daily with PH-balanced water until harvest, which should be in approximately two weeks.
I’ve found that most microgreen varieties grow best without soil. To grow microgreens without soil, you’ll need to use a hydroponic method of growing plants. All you need is a growth medium such as coconut coir, hemp fiber, or growth mat, and a misting bottle. You can also set up a more elaborate hydroponic system that uses only nutrient-rich water instead of the growth medium.
Yes. If you are growing microgreens hydroponically, punch holes in the trays and use coconut coir to retain moisture. If you are using soil, the soil can become waterlogged without proper drainage, which won’t allow the seeds to germinate.
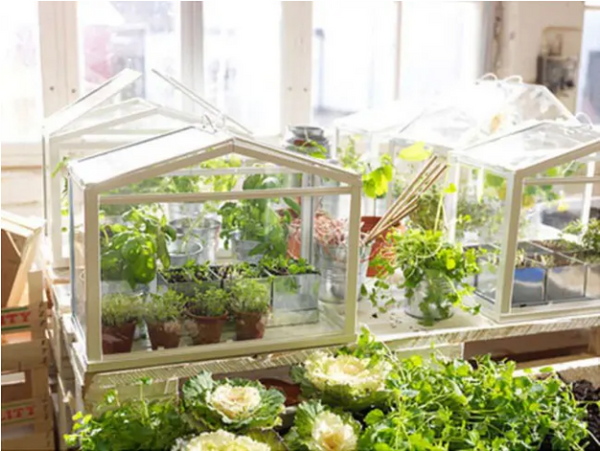 Credit: balconygardenweb.com
While an outdoor greenhouse takes advantage of the natural sunlight to help the microgreens grow, I used this greenhouse indoors. I attached a blue LED light strip to the lid of the greenhouse to promote better growth.
The frame is a simple cube box frame I made using 12 equal lengths of EMT conduit and 90-degree structural pipe connectors. I made a single panel using four equal lengths of conduit and connectors for the lid. Then I cut six squares of heavy-duty clear vinyl. I glued five of the squares to the inside of the frame using a hot glue gun and the remaining piece to the underside of the lid frame.
The lid can be left unattached, but I drilled small holes in the pipe and the open end of the box to attach hinges.
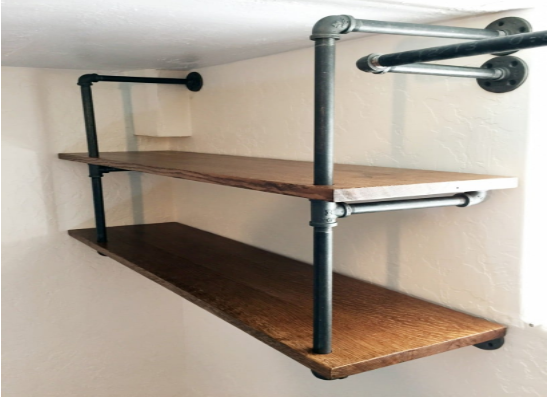
Credit: chrislovesjulia.com
My home always seems short on space, and my windowsills won’t hold enough microgreens planters. To get around this, I mounted a shelf on my wall. I easily constructed a wall shelving system from EMT conduit and structural pipe fittings to grow microgreens indoors. Best of all, since these plants grow well hydroponically, I tried growing microgreens without soil to reduce the mess and fuss of indoor gardening.
For a two-tier indoor garden shelf, I needed two 40-inch lengths of conduit and six lengths of conduit the same width as the shelving. For shelving, I used reclaimed wood, but you can use any durable lightweight wood. I also needed four 90-degree structural pipe connectors, two 180-degree structural pipe connectors, and four fittings to mount the system to the wall.
To make the system, I constructed two frames. Then I placed the 180-degree pipe fitting in the center of the vertical length of pipe, before connecting the two short lengths of pipe to either end of the vertical piece using 90-degree connectors. At the end of each horizontal length, I attached a wall mount fitting then add another short length of pipe to the 180-degree connector. I added end plugs to the ends of the pipe and connectors for a more professional finish. I repeated for the second frame.
I mounted the frames to the wall (use the wall studs for stability) and laid the wooden shelving across. I also secured the shelving using small screws.
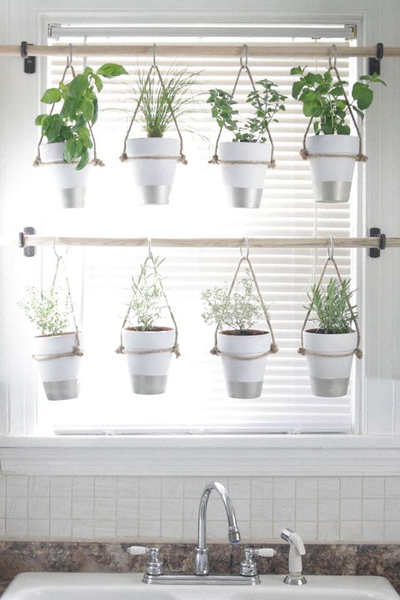 Credit: countryliving.com
A hanging garden is an ideal solution for indoor micro gardeners like me, who have little space to spare. Mount EMT conduit pipe across a window that receives the best light and hang small planters from the rail.
To make a hanging microgreen garden, I measured 2-3 lengths of EMT conduit approximately four inches wider than the window. I used 90-degree structural pipe fittings at either end of the conduit to attach to mounting fixtures. Then I pre-drilled holes in the wall and attached the pipe. I chose lightweight planters such as aluminium pails, which I attached using S-hooks.
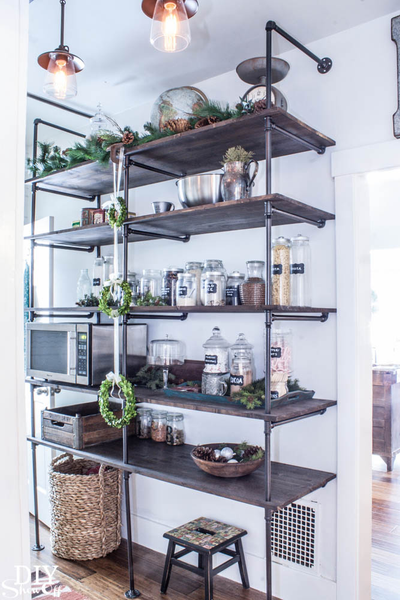 Credit: diyshowoff.com
If you are planning to start growing microgreens for profit, you will need to build a structure that offers more space to start your microgreen seeds. A growing frame is the perfect solution and makes use of the vertical space in your yard or home. This means you can maximize your yield-to-space ratio for better profit margins. Lower overhead costs by growing microgreens hydroponically as you need less water. Many types of microgreens prefer to be grown hydroponically and produce better yields.
To make my four-shelf growing frame, I took four wire racks, four 62-inch lengths of EMT conduit, eight lengths of conduit of equal length to the shelves, and eight lengths of conduit of equal width to the shelves. I also needed 16 90-degree structural pipe connectors and eight end plugs. Then I used the connectors to attach the shelf length conduit to the longer vertical lengths. Once the frame was finished, I secured the wire racks to the frame using zip ties.
Microgreens are a simple way to grow delicious salad vegetables and herbs all-year-round.
Check out what the team at Molly’s Micros was able to do with their recent Hydroponic NFT Microgreen System:
If you are looking to start a microgreens business or looking to scale, we can be the perfect partner to helping you achieve your business goals.
Sean Haverty from Molly’s Micros had this to say about his experience working with us:
Thanks, we love you guys already! We are a growing company that has started its roots growing in soil. However, as we grow the need to reduce labor of multiple daily watering LS has brought us to seek out the hydroponic solution. I expect we will be purchasing more systems in the near future to keep up with demand. Keep up the good work and we will keep in touch!
Sean Haverty
Molly's Micros, CEO
Molly’s Micros is not the only business that has seen the benefit of incorporating our structural pipe fittings into their NFT racks.
In the video below, watch how CJ of On the Grow incorporates our pipe fittings into one of his recent builds:
To find out more about the selection of structural pipe connectors we have available, contact Maker Pipe on (843) 245-9747.


