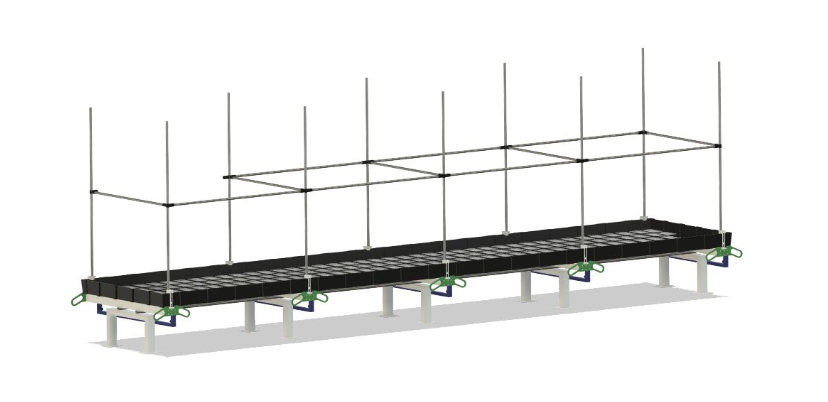
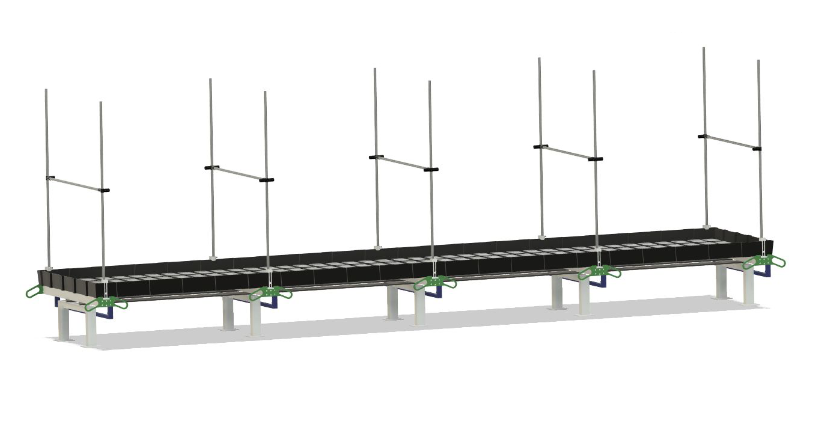
The Botanicare Sliding Bench is a really popular hydroponic flood table and rightfully so. It is feature packed and extremely versatile. It comes in various dimensions and has attached trellis mounts. Today we are going to talk about the Botanicare Trellis Kit and see how it works.
The Base & Add On Kit
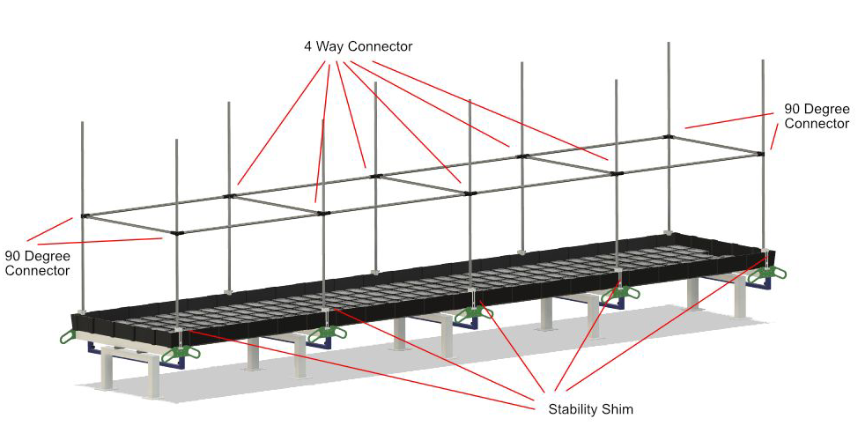
Before we dive into how to make it, let's look at the two kit options and what's included with each of them. The "Base Kit" is made up of four 90 Degree Connectors, two 4-Way Connectors, and six stability shims. The four 90's are used in the outer most corners and the 4 Way Connectors are used to break up the long continuous spans of conduit between the 90 Degree Connectors. The Botanicare trellis mounts are designed for 3/4" EMT Conduit. The fitment isn't perfect which is why we make the shims to fill in the gaps and add stability. The Base Kit is meant for the rolling bench that is no more than 8 foot long. What if you have or want the longer Botanicare bench?
The "Add On Kit" Consists of two 4-Way Connectors and two stability shims. The additional two 4 Way Connectors in this kit work the same way they do in the Base Kit. You'll want to use them to add supports for every 3-4 feet of bench that you add. For example, if you purchase the 20ft. 6in. rolling bench, you'll want to get one Base Kit and four Add On Kits.
Tools Needed For The Build
Cutting conduitand building with our connectors is a really simple process. To cut conduit you need a tape measure, marker, and sharpie or maker. Our connectors have built it pockets that lock the nuts in place when assembling them so you only need one 5mm hex wrench to tighten the bolts.
Step 1: Mark & Cut Your Verticals
The measurement that you mark and cut here depends on your desired trellis height. We rarely see people build these trellises higher than 4 or 5 feet high. However, you can potentially go higher if you brace the framework with 45 Degree Connectors. Since all of the connectors in both kits require the vertical through pipe, you can figure out exactly how many verticals you need to cut early on. For example, the one Base Kit and four Add On Kits from earlier is fourteen total connectors so you'd need fourteen total vertical pipes.
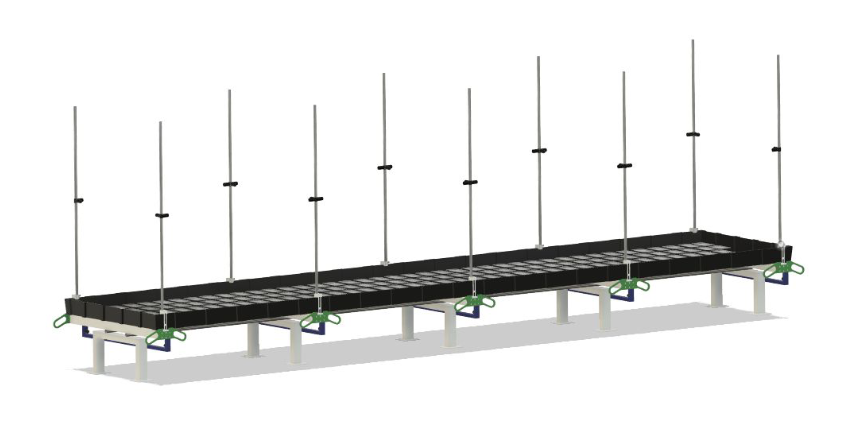
Step 2: Add Connectors To The Verticals
Next you will want to add all the connectors loosely to the vertical pipes. You can add them wherever you'd like along the vertical pipes. Make sure to install them all at the same height. At this stage you can loosely hand tighten the hardware to hold the connectors in place without fully tightening them.
Step 3: Install The Verticals In The Bench
Now you can take all of the verticals from the previous steps and install them into the Botanicare trellis mounts. To do this you will need to add a stability shim to the very bottom of the vertical pipes. Once you have the stability shim on the pipe, you can slide it down into the trellis mount really easily.
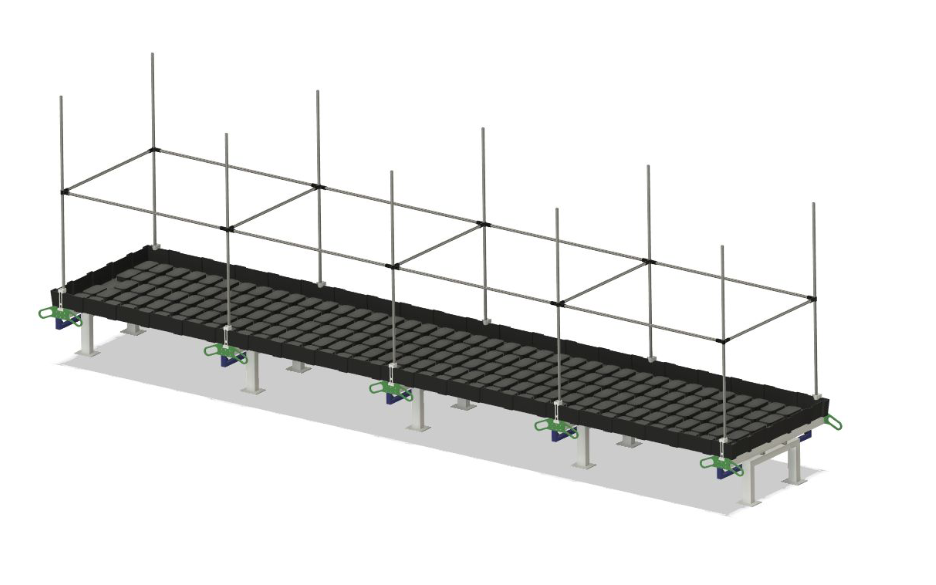
Step 4: Add The Cross Bars
Once you have the verticals and appropriate connectors in place, it is really easy to figure out the remaining pipe measurements. All you have to do is measure from where the conduit terminates inside of one connector all the way to the other. The amount of these cross bars that you need depends on the size of your sliding bench. You basically need one cross bar for every two connectors that you have facing each other.
Step 5: Add The Connecting Pipes
After step four, your bench probably looks like it has hurdles set up on top of it. Now we need to finish off the build by adding pipes in the remaining connector openings. You can use the same strategy as step four to figure out the needed lengths for those pipes.
Step 6: Tighten All The Connections
After all the connector openings have a pipe inside, you can fully tighten all of the hardware to finish off the build.
Conclusion
We are here and happy to help if you have any questions about this particular kit and build or really any DIY project in general. If you're more of a visual learner like me, there is a video breakdown of this kit which you can watch here. Below is a downloadable e-book for growers that you can get for free after signing up to receive emails. Thanks for stopping by and happy building.


 Once you have the verticals and appropriate connectors in place, it is really easy to figure out the remaining pipe measurements. All you have to do is measure from where the conduit terminates inside of one connector all the way to the other. The amount of these cross bars that you need depends on the size of your sliding bench. You basically need one cross bar for every two connectors that you have facing each other.