
Your Cart is Empty
Maybe you don't have any available space in your yard. But you still want an herb garden? Fortunately, you can grow your plants without soil. You'll have the garden you desire if you're willing to invest some time and creativity into a DIY hydroponics gardening system. With such a system, even city dwellers can and do grow their own food without much hassle.
Are you a city-dweller looking to create a beautiful garden? A well-constructed hydroponics system can help you get it!
In general,hydroponics is a great idea for people with limited space or those with nutrient-poor soil. In this post, we'll show you how you can set up a functioning DIY hydroponics gardening system.
Hopefully, that'll help you grow your veggies and save a bundle in the long term!
There isn't a fixed number of hydroponics systems or techniques. You can combine different materials in creative ways to create different systems.
Only the availability of material and your imagination will limit you!
You might prefer something a bit involved such as the flow and ebb design. Or you might choose something as simple as a bucket system. It’s up to you.
Good news. It's possible to create such a system without spending a dime using free or reclaimed materials.
At its core, a DIY hydroponics gardening system comprises of a grow box and a watering mechanism. Also, you need some way to support the plants.
These 7 steps should guide you to a money-saving hydroponics system.
Let's jump right in!
First off, decide where you'll position your system. You may want to place your system in an enclosed space. If you live in a rural area, a greenhouse would be a great place to install the system. But if you live in a city, you can also install it in your basement.
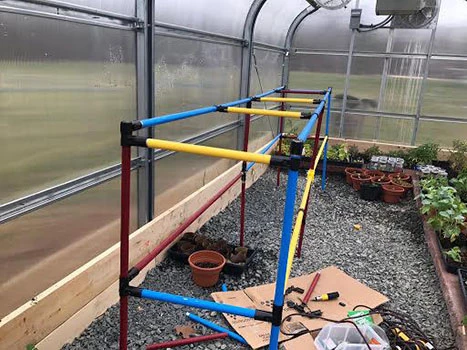
If you’re going the greenhouse route, the combination of electrical conduit and our pipe connectors can add needed organization and maneuverability for your projects
You can also opt to have your garden outdoors. But you'll need to shield it from nature's harsh elements. A wind barrier is one way to provide such protection. Also, be sure to monitor the water levels. Knowledge of your system’s water levels is critical, especially in cases when temperatures are insanely high and water evaporates incredibly fast.
Also, make sure you can easily move the system indoors in case it gets too cold outside. For indoor setups, you'll also need a bit of supplemental lighting for indoor gardening.
It's time to organize your resources into a fully functioning system. You need 6" growing tubes and smaller tubes for dispensing fertilizer. PVC pipe would be your best option for your growing tubes.
Compared to EMT, PVC is more cost-effective for this application and the material makes for easier creation of holes, which will be made in the next step.
With these pipes, making holes where your plants will stand should be a breeze. Also, you need a 50-gallon tank for holding nutrients. Finally, you must have a pump.
Make upward-facing holes in your PVC (growing tubes). Then, have these pipes sit in neat rows.If you’re working in the cannabis space, you may find this article helpful for building the required structure.
The 50-gallon tank we mentioned above holds the nutrient solution. Inside itlives the pump that pushes nutrients into narrow tubes that then deliver the nutrients to the roots. The nutrients come out via tiny holes in the tubing. These pipes stay inside of the larger growing tubes. Aside from supplying nutrients, these jets also ensure your plants get enough oxygen.
Add 50 gallons of water into the nutrient tank. For the purposes of this article, we'll assume you know what nutrients your plants need,and have already purchased them. Read the fertilizer's label to know how many cups you should pour into the water.
Typically, it's 2 cups. However, it's best to stick to the manufacturer's recommendation.
Next, turn the pump on and leave it running for about half an hour. That's normally how long it takes to mix the fertilizer and water completely.
It's time to introduce your plants to the growing tubes. But before doing that, be sure your plants are soil-free. Why? It’s because soil can clog up the tiny holes where nutrients are dispensed.
Whether you're using your own plants or you bought them, wash the roots in lukewarm water. Avoid water that's too cold or too warm as extreme temperatures canshock your plants.
Put the plants in the planting cups. That's easy and self-explanatory. But how will you firm the plants given you won't use soil? That's whereexpanded clay pebbles come in. Pour them through the holes in the growing pipe, all around the plant.
These pebbles provide much-needed support for your seedlings and ensure they stay upright. Sure, they're quite hard. However, they're also very lightweight. You can be sure that they won't hurt the roots.
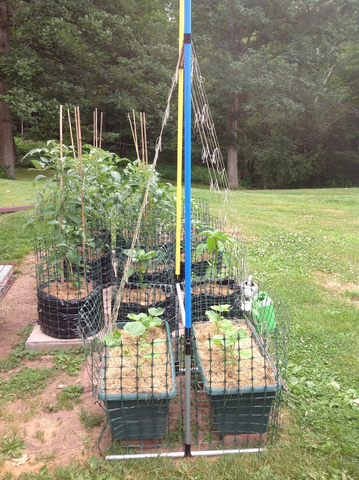
Tie your plants to the trellis. A trellis is particularly important if you're growing tomato, cucumber, passion fruit, or any other sprawling plant. Not only do strings offer added support but they also help you make the most of your limited space. Tie one end of the string to the trellis while attaching the other to the plants' base. Next, intertwine the plants' tips with the string. This network of strings trains your plants to grow upward.
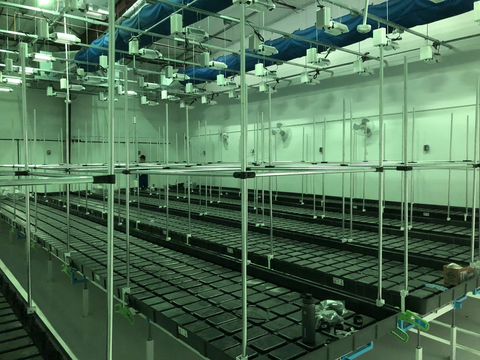
What's better than coming home to watch green, lively, and beautiful plants grow? Nothing! No matter how hard your day at work might be, you have something to look forward to. Whether you're growing tomato or cannabis, you'll enjoy every moment of just gazing at nature's wonders.
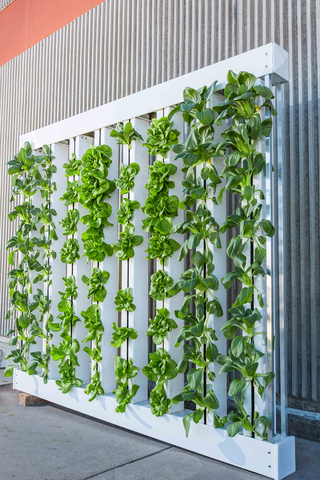
A beautiful vertical farm supported by a hydroponics system
Some people even say that watching the green, growing plants heals and rejuvenates. But, we’ll let you be the judge of that!
Make sure your plants aren't exposed to too much heat and evaporation. Also, make sure to maintain your fertilizer's nutrient and pH levels at appropriate levels.
You likely won’t need a timer. That's because you'll have the pump running the whole time.
Note: At no time should the tank be permitted to dry out. If that happens, the pump's risk of burning up increases dramatically.
Also, understand that plants raised this way tend to grow quite fast. You'll want to tie them to the support strings using strings or clips.
Finally, manage pests and diseases. Inspect your plants regularly for any signs of pest attacks or diseases. Chewed leaves, stems, and fruits with holes or unsightly spots are evidence of pest infestation or disease.
Controlling diseases may require you to remove the affected plants and discard them. As to insects and bugs, pick them and exterminate them in some way. That said, hydroponic plants typically demonstrate greater resistance to pest and disease attack.
Yes. You can use it without worry. They provide protection for conductors of electricity, but power doesn’t pass through them directly. They're absolutely safe.
In addition, EMT conduit is long-lasting and also resists impact, corrosion, and rusting. They'll even endure chemical exposure.
Talk to us. We offer a vast assortment of high-quality structural pipe connectors and accessories that are only rivaled by our expertise in helping you get started with your DIY project.
Why not initiate a live chat now? Or give us a call today? It's easy, quick, and pain-free.
Contact us here for more information.


