
Your Cart is Empty
Hello and welcome back to another episode of Maker Pipe Monday. This is a video series we do every Monday where we take a look at all of the builds that have been posted in the Maker Pipe Community. Today we have some more great DIY pipe projects and we are exited to share them with you. Now let's get on to the builds!
First one we've got is by Julia. She made this fantastic covering for her second floor deck and she did it in a really simple and efficient way.She used an Ikea shade and she stretched it from the roof to the front of the deck.
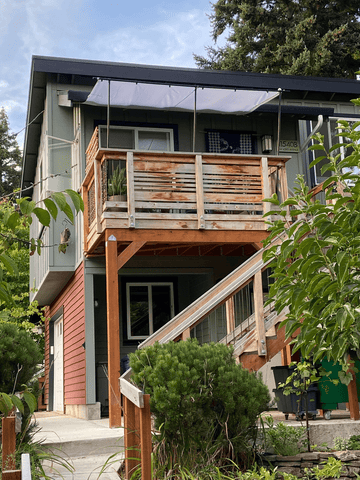
She made this black frame out of conduit and didn't need very many connectors for this project. It looks like 6 total T connectors on it and some black shrink wrap. She used bungees and some grommets that she fitted to the IKEA shade and it came out great.
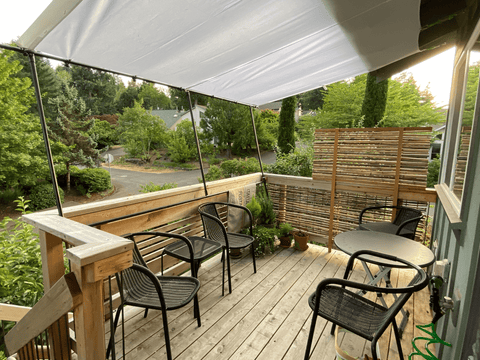
She secured it to the deck with some off the shelf 2 hole straps. It looks awesome and we appreciate the post in the community.
Next build we have is an outdoor rain shelter built by Scott in Alaska.He needed something that could hold up to Alaskan weather which is pretty harsh.
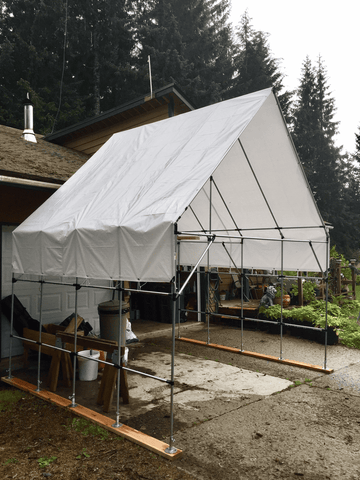
He took an ordinary tarp and stretched it over the Maker Pipe and conduit frame. He used 45 degree connectors to transition the side walls and roof. He then used T connectors for the roof peak. This is a cool trick to keep in mind, when you stagger T connectors you can achieve pretty much any angle that you need.
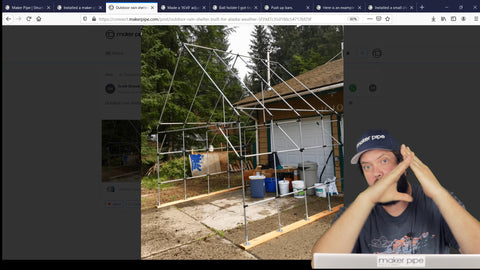
He added some 45 degree bracing and it looks sturdy. Thanks for sharing Scott!
Next up is Paul’s custom projector screen frame. This build has been popular over the last few months, but Paul added a cool twist to his screen project.
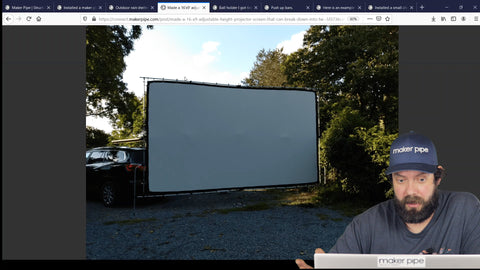
He made it adjustable for easy storage!
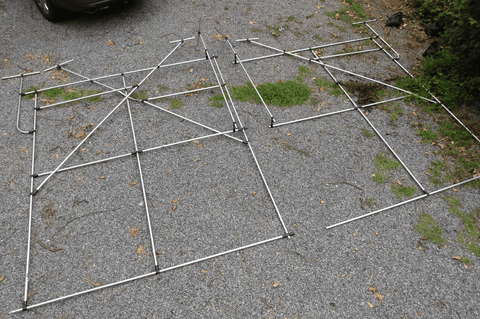
It is 16ft by 9ft and is designed to be taken apart and stored flat. He did a good job with the design and incorporated a screen from Carl’s Projector Screens. He built two panels with a stand built into the back, and added sandbags for more security. He used 45's for the legs and braces.
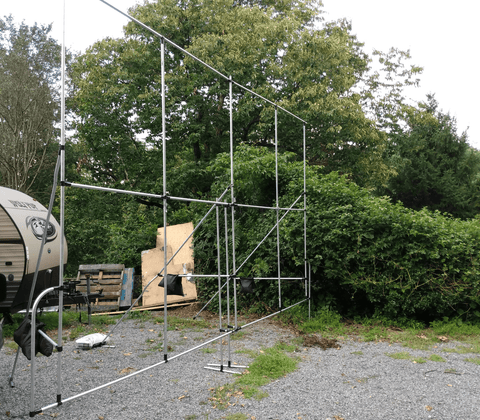
It is an awesome build and we are happy that he was able to share it with the community. Thanks Paul!
Next up is Scott’s garage ball holder. He used 8 T connectors to make an elongated cube, and added bungees to keep the balls secured in the rack.
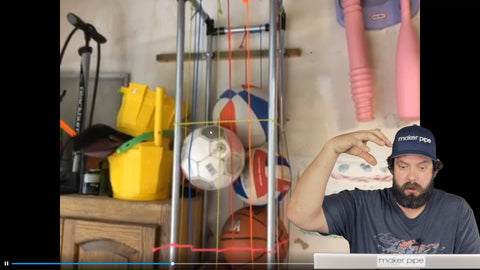
He mounted it to the wall with conduit straps and it turned out great. Thanks for sharing Scott!
Scott also built these DIY push up bars. He used bent conduit for the handles and 4 T connectors.

Push up bars put your wrists and arms at a better angle when performing push ups. It is safer and works more muscles when using the bars. They look great with the added shrink wrap and rubber feet to keep the floor from being scuffed. Another great build by Scott!
Next we have a build by Debbie that Kelly shared on the community for her. It is a shelving unit designed for a kids bedroom.
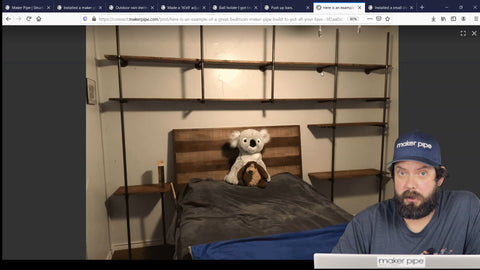
It has 4 levels of storage and is custom sized to fit the room it’s in. It looks great with the stained wood for the shelves. She used T connectors to support the shelves and mounted the structure to the wall with ¾” pipe flanges. The flanges are usually used with threaded pipes, but you can also push EMT into it and still have a sturdy connection.
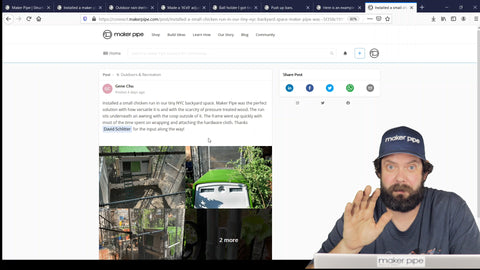
The last build we have is by Gene. She is in New York City and wanted to have a chicken run.
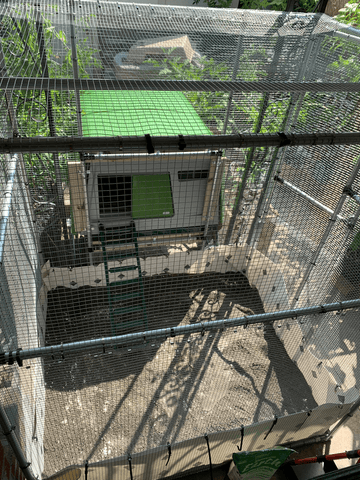
She added a door here and used the Igloo roost.
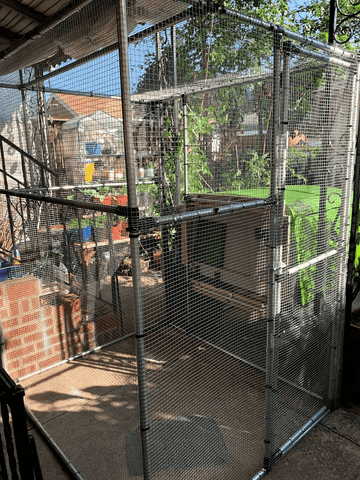
She built the frame with a few T connectors and added some chicken wire for the walls. It is a great build that utilizes the space well. Thanks for sharing Gene!
That’s all the builds we have for you this week. If you want to see more head over to the community and check out the awesome builds shared there.For a video version check out the link below. Thanks so much, and we will see you next time!


